Swapping out a table saw blade might seem tricky, but it’s actually pretty simple—and it can save you time and money. I remember my first time doing it. I struggled with the wrench, second-guessed myself, and worried I’d mess up my saw. But once I got the hang of it, I realized it’s quick and easy if you follow the right steps. In this guide, I’ll show you how to change a table saw blade safely and easily. Whether you’re a DIYer or a pro, you’ll be back to cutting in no time—let’s get started!
Tools and Safety Precautions

Before we dive into changing the blade, let’s talk about what you need and how to stay safe. A table saw is a powerful tool, and a little caution goes a long way. The last thing you want is a nasty cut—or worse—just because you rushed the process.
Tools You’ll Need
Swapping out a table saw blade doesn’t require a ton of tools, but having the right ones makes the job easier:
- Wrench or Blade-Changing Tool – Most table saws come with one, but if you lost yours, an adjustable wrench works too.
- Screwdriver – Some saw models require one to remove the throat plate.
- Work Gloves (Optional) – Not a must, but they can help prevent accidental cuts when handling sharp blades.
👉 Quick Answer: You’ll need a wrench, possibly a screwdriver, and gloves if you want extra protection.
Safety First
I’ve seen people skip safety steps because they’re in a hurry—don’t be that person! A few extra seconds of precaution can save you from a painful mistake.
- Unplug the Saw – This is rule #1. Never work on a saw that’s still connected to power.
- Wear Safety Glasses – Even though you’re not cutting, metal dust or tiny debris can still fly up.
- Wait for the Blade to Stop – Don’t rush. Give it a few seconds after turning off the saw.
👉 Quick Answer: Always unplug the saw, wear eye protection, and make sure the blade has fully stopped before touching it.
Taking these simple steps keeps you safe and ensures a smooth blade swap. Now that we’re set, let’s get to work!
Step-by-Step Guide to Changing a Table Saw Blade

Now that you’ve got your tools ready and safety precautions in place, let’s get that blade swapped out. It might seem complicated, but trust me—it’s easier than you think. Just follow these simple steps, and you’ll have a fresh blade on in no time.
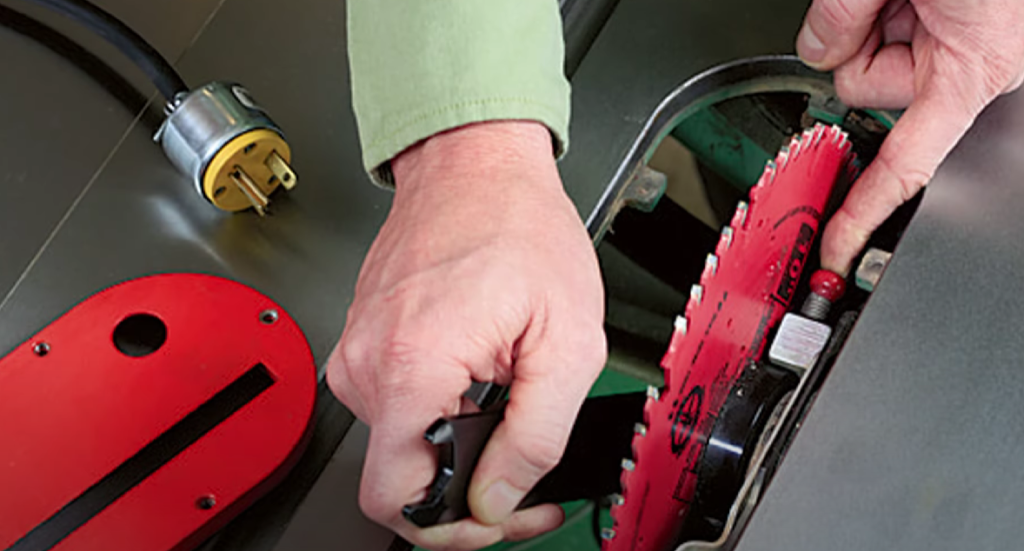
Step 1: Unplug and Secure the Saw
Before you even think about touching the blade, unplug the saw. If it’s a cordless model, remove the battery. This one step prevents accidents and should always be your first move.
👉 Quick Answer: Always disconnect power before changing the blade—it’s a must for safety.
Step 2: Remove the Throat Plate and Blade Guard

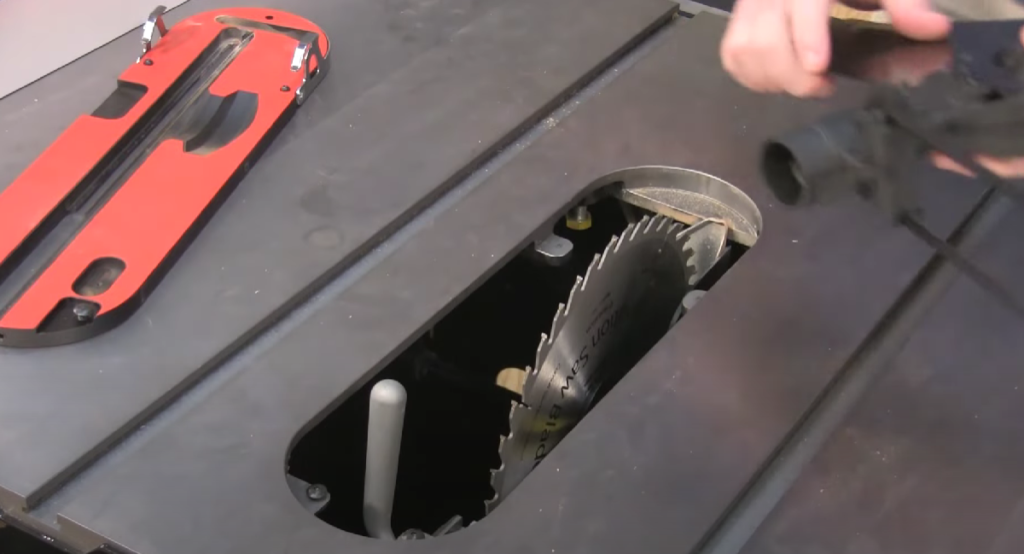
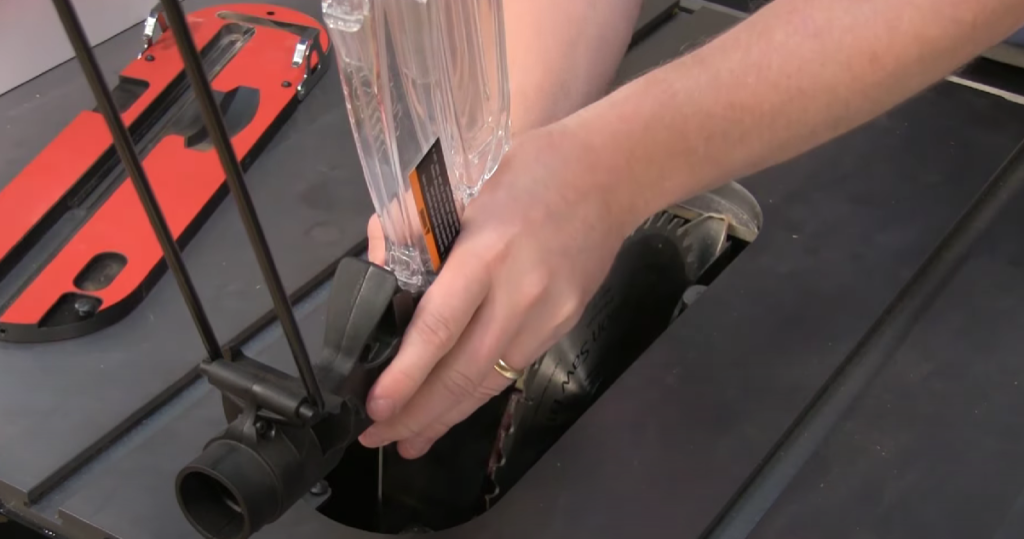
The throat plate is the flat piece surrounding the blade. Lift it out—some pop out easily, while others need a screwdriver. If your saw has a blade guard, remove it too.
👉 Quick Answer: Take off the throat plate and blade guard to access the blade.
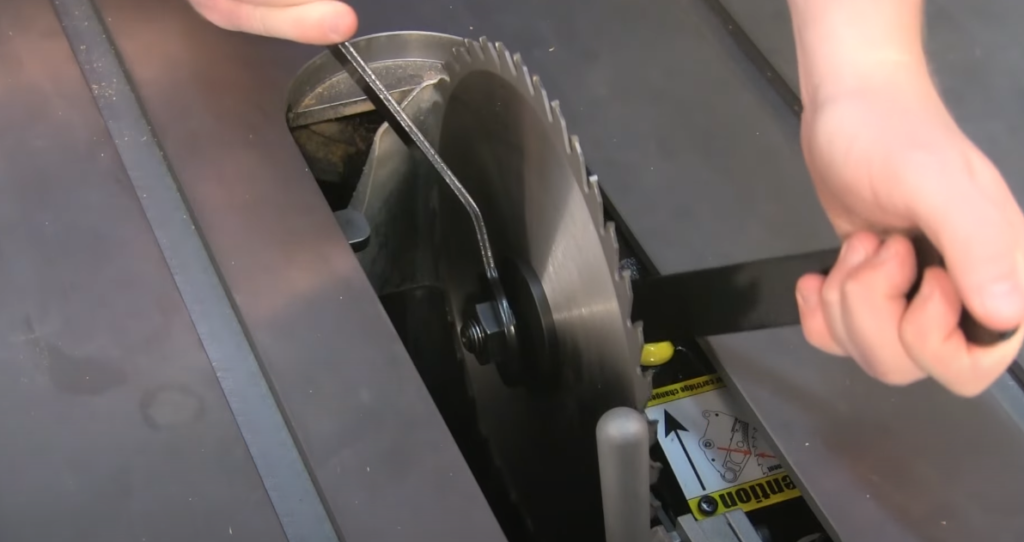
Step 3: Loosen the Arbor Nut
The arbor nut holds the blade in place. Use the saw’s wrench to turn it counterclockwise. If it’s stuck, wedge a block of wood against the blade to stop it from spinning while you loosen the nut.
👉 Quick Answer: Use a wrench to loosen the arbor nut, turning it counterclockwise.
Step 4: Remove the Old Blade

Carefully slide the blade off the arbor. These blades are sharp, so grab it from the sides, not the edges. If you’re wearing gloves, now’s the time they’ll come in handy.
👉 Quick Answer: Lift out the blade carefully, avoiding sharp edges.
Step 5: Install the New Blade

Check the arrow on the new blade—it should match the saw’s rotation direction. Slide it onto the arbor, making sure it sits flat.
👉 Quick Answer: Match the arrow on the blade with the saw’s rotation before installing.
Step 6: Tighten the Arbor Nut
Put the arbor nut back on and tighten it by hand first. Then, use the wrench to secure it—but don’t overtighten! A snug fit is enough.
👉 Quick Answer: Tighten the arbor nut firmly, but don’t overdo it.
Step 7: Reattach the Throat Plate and Blade Guard
Pop the throat plate back into place and reinstall the blade guard if your saw has one. Make sure everything is aligned properly.
👉 Quick Answer: Secure the throat plate and blade guard before turning on the saw.
Step 8: Test the Blade Before Use
Before cutting anything, give the blade a manual spin to check for obstructions. Then, plug in the saw and do a quick test run at a low speed. If everything runs smoothly, you’re good to go!
👉 Quick Answer: Manually spin the blade and do a low-speed test before cutting.
That’s it! You just changed your table saw blade like a pro. Now, let’s talk about some common mistakes to avoid.
Common Mistakes to Avoid
Changing a table saw blade isn’t rocket science, but there are a few easy-to-miss mistakes that can turn a simple task into a frustrating (or even dangerous) experience. I’ve made a couple of these myself when I was just starting out, so let me save you the headache. Here’s what NOT to do.
1. Forgetting to Unplug the Saw
This might seem obvious, but you’d be surprised how many people skip this step—especially when they’re in a rush. Working on a saw that’s still plugged in is a serious hazard. Even if the power switch is off, an accidental bump could turn it on.
👉 Quick Answer: Always unplug the saw before changing the blade—it’s the easiest way to prevent accidents.
2. Installing the Blade Backward
I’ll admit it—I’ve done this before. You mount the blade, tighten everything up, fire up the saw, and suddenly it’s struggling to cut. That’s a sure sign the teeth are facing the wrong way. Always check the arrow on the blade and match it to the saw’s rotation.
👉 Quick Answer: Make sure the teeth face forward in the direction of the saw’s rotation.
3. Over-Tightening or Under-Tightening the Arbor Nut
If you tighten the arbor nut too much, you might have a hard time loosening it next time. But if it’s too loose, the blade could wobble or even come off while cutting. The trick is to snug it up firmly—tight, but not cranked down with brute force.
👉 Quick Answer: Tighten the arbor nut securely, but don’t overdo it.
4. Using the Wrong Type of Blade
Not all blades are created equal. If you’re cutting plywood with a rough framing blade, expect tear-out. If you try to rip hardwood with a fine-tooth crosscut blade, you’ll burn the wood and wear out the blade faster. Choose the right blade for the material.
👉 Quick Answer: Match the blade to the material for cleaner cuts and better performance.
5. Skipping a Test Run
The last thing you want is to realize something’s wrong after you’ve started cutting. Always give the blade a quick spin by hand to check for obstructions, then do a test run at a low speed before making any cuts.
👉 Quick Answer: Spin the blade by hand first, then do a low-speed test run before cutting.
By avoiding these common mistakes, you’ll make blade changes quicker, safer, and frustration-free. Now, let’s talk about when it’s time to swap out your blade!
How Often Should You Change a Table Saw Blade?
If you’re wondering when to swap out your table saw blade, the answer isn’t one-size-fits-all. It depends on how often you use it, what materials you cut, and how well you maintain it. But there are a few clear signs that tell you when it’s time.
1. Burn Marks on the Wood
If your cuts leave dark burn marks, it’s not just bad technique—it’s often a dull blade. A sharp blade glides through wood cleanly, while a dull one drags and generates friction, burning the edges.
👉 Quick Answer: Burn marks on wood usually mean your blade is dull and needs replacing or sharpening.
2. Difficulty Cutting
Does your saw feel like it’s working harder than usual? Maybe you’re pushing harder to get through a cut, or the motor sounds like it’s struggling. A sharp blade should slice through wood with minimal effort.
👉 Quick Answer: If cutting feels harder than before, your blade is likely dull and needs to be changed.
3. Excessive Vibration or Noise
A table saw should run smoothly. If you notice unusual vibrations, chattering, or a whining noise, the blade may be worn, unbalanced, or even warped. A damaged blade isn’t just annoying—it’s dangerous.
👉 Quick Answer: A wobbly, noisy blade is a sign of wear or damage—replace it for safer, cleaner cuts.
4. Rough or Splintered Cuts
If your once-clean cuts start looking rough or splintered, your blade’s teeth may be dull or damaged. A sharp blade should leave a smooth edge with minimal tear-out.
👉 Quick Answer: Splintered cuts mean your blade is past its prime—time for a new one.
5. Cutting the Wrong Materials
Using a general-purpose blade for everything? That can wear it out faster. If you cut plywood, MDF, or metal frequently, your blade will dull quicker than if you stick to softwoods. Choosing the right blade for the job helps extend its life.
👉 Quick Answer: Blades wear out faster if used on dense materials—match your blade to the job.
How Long Does a Table Saw Blade Last?
With regular use, a high-quality carbide-tipped blade can last 6 to 12 months before it needs replacing or sharpening. If you’re a weekend DIYer, it may last years. If you’re cutting every day, expect to replace it more often.
👉 Quick Answer: A good carbide blade lasts 6-12 months with regular use—sharpen or replace as needed.
The bottom line? Pay attention to your cuts. If your saw starts struggling, your wood burns, or your cuts aren’t clean, it’s time to swap out the blade.
FAQs:
When it comes to changing a table saw blade, a few common questions always pop up. Here are the answers you need—quick, clear, and to the point.
1. How long does it take to change a table saw blade?
If you’ve done it before, it’s a 5- to 10-minute job. If it’s your first time, allow 15-20 minutes to go through the steps carefully. The more you do it, the faster and easier it gets.
👉 Quick Answer: Changing a table saw blade takes 5-10 minutes with practice.
2. Can I sharpen a table saw blade instead of replacing it?
It depends on the blade. Carbide-tipped blades can be sharpened multiple times by a professional, while cheap steel blades usually aren’t worth the trouble. If your blade is dull but still in good shape, sharpening can extend its life.
👉 Quick Answer: Yes, but only if it’s a carbide-tipped blade—otherwise, replacement is usually better.
3. What’s the best blade for my table saw?
It depends on what you’re cutting. For general woodworking, a 40-tooth combination blade works well. For finer cuts in plywood or MDF, go for a higher tooth count (60-80 teeth). If you’re ripping thick hardwood, a 24-tooth rip blade is best.
👉 Quick Answer: Use a 40T blade for general use, 60-80T for fine cuts, and 24T for ripping hardwood.
4. Do I need special tools to change a table saw blade?
Most table saws come with a blade-changing wrench, but an adjustable wrench works too. Some saws have an arbor lock button, making the process even easier. Work gloves can help, but they’re optional.
👉 Quick Answer: No special tools needed—your saw’s wrench or an adjustable wrench will do.
5. How do I know if my table saw blade is installed correctly?
Check the rotation arrow on the blade and match it to the saw’s spinning direction (usually toward you at the front). If the teeth are facing the right way, you’re good to go!
👉 Quick Answer: Match the blade’s arrow to the saw’s rotation—teeth should face forward.
Conclusion: Keep Your Table Saw Working Like New
Changing a table saw blade may sound tricky, but it’s actually pretty simple. Once you’ve done it a couple of times, it becomes easy. A sharp blade makes cleaner cuts, keeps you safe, and helps your saw last longer. Whether you’re swapping blades for a smoother finish or replacing a dull one, knowing how to do it saves time and effort.
👉 Quick tip: A fresh blade cuts better, faster, and safer.
Always put safety first—unplug the saw, wear safety gear, and check everything before turning it on. A properly installed blade makes cutting smooth and stress-free.

